No Comment

Pumpkin Face in Photoshop (Annoying Orange)

To start this tutorial, you need two images. One of a pumpkin, and one of a human. Of course, you can use any fruit/vegetable that you desire. Both images that I’m using were found at Shutterstock.com.
PumpkinStart Pumpkin Face in Photoshop (Annoying Orange)
StartingHumna Pumpkin Face in Photoshop (Annoying Orange)

The Mouth

Once you have your two images, it’s time to begin! Place the image that contains the face, overtop of the image of the pumpkin. Once both images on in the same document, decrease the Opacity of the face’s image to help you better line it up. You can quickly decrease the Opacity to 60% by pressing the number 6 on your keyboard.
DecreasedOpacity Pumpkin Face in Photoshop (Annoying Orange)
Once it’s in place, increase the Opacity back to 100%. Now we need to isolate the mouth from everything else that came with the image. With any of the many selection methods that are available to you, create a selection around the mouth. It can be basic, or super specific. I chose to use a simple Marquee selection.
MouthMarquee Pumpkin Face in Photoshop (Annoying Orange)
When the selection has been created, it’s time to hide everything other than the mouth. This can easily be done with a Layer Mask. At the bottom of your Layers Panel, press the Add Layer Mask button.
LayerMask Pumpkin Face in Photoshop (Annoying Orange)
Now that a Layer Mask has been added, using a black brush will allow you to hide additional parts of your layer, while a white brush will allow you to bring those hidden parts back. So with a black brush, brush around the outside of the mouth, to hide the leftover skin.
LayerMaskMouth Pumpkin Face in Photoshop (Annoying Orange)
At this point, the lips clearly don’t match with the orange pumpkin. There are many ways you can get around this, including the use of Adjustment Layers. Let’s start by adding a Hue/Saturation Adjustment Layer.
HueProperties Pumpkin Face in Photoshop (Annoying Orange)
You may notice, once you add and adjust the Hue/Saturation, that your whole image is being change. This is because you need to clip the Adjustment Layer with the previous layer. This can be done with the ‘clip’ button, which you can see circled above. Once it’s clipped, you should start to see a more natural result.
MouthClipped Pumpkin Face in Photoshop (Annoying Orange)
Of course, you can continue to add Adjustment Layers as needed. I chose to add a Levels Adjustment Layer, as well.
Levels Pumpkin Face in Photoshop (Annoying Orange)
Remember: All Adjustment Layers come with a Layer Mask, so at anytime you want to hide/show portions of that Adjustment Layer, you can easily use your black/white brushes to do so.

The Eyes

For the eyes, you can use the exact same method that you used for the mouth, which will give you a decent result, but you may still be left with some visible skin.
Eyes Pumpkin Face in Photoshop (Annoying Orange)
In that case, you may want to add a Bevel and Emboss Layer Style, to give the impression of depth. Here are the settings that I used for the eyes.
EyesBevel Pumpkin Face in Photoshop (Annoying Orange)
Remember: Depending on the size of your document, you may need to tweak the settings to get the result that you’re after. Here is what it looks like after the Bevel has been applied.
EyesFinal Pumpkin Face in Photoshop (Annoying Orange)
And that should do it! Your own human pumpkin, made in Photoshop! Try it out yourself, and share it with the world!
No Comment

Create a Photo Manipulation of an Emotional Dancer in a Forest Part 1

What you’ll be creating

We’ll start this tutorial by creating an autumn forest scene from two stock photos. Then we’ll adjust color, shade and light as well as make a dreamy effect. Later we’ll add the model and do some retouch to match her with the scene. After that we’ll use two stocks to create lighting effect. Finally we’ll use some adjustment layers to boost the final result. You’ll need Photoshop CS3 or newer to follow this tutorial.
dance51-final

Tutorial Resources

Step 1

Create a new document in Photoshop with the settings below:
dance1

Step 2

Open the forest image. Use the Move Tool (V) to drag it into our white canvas:
dance2
Go to Edit > Transform > Flip Horizontal:


dance2a

Step 3
 To create some depth to the background , go to Filter > Blur > Gassian Blur and set the radius to 6 px:dance3

Step 4

To make some light for the background, go to Layer > New Adjustment Layer > Curves and increase the lightness:
dance4
On this Curves layer mask use a basic, soft brush with black color to erase the left:
dance4a

Step 5

To make the left darker I used another Curves adjustment layer :
dance5
On this Curves layer mask use a soft black brush to erase the right to keep its brightness:
dance5a

Step 6

Open the ground image. Hit Cmd/Ctrl+Option/Alt+Shift+N to make a new layer. Active the Clone Tool (S) and use it to remove some branches on the ground:
dance6

Step 7

Press Cmd/Ctrl+Option/Alt+Shift+E to merge the background layer and the clone one. Move the merged layer into our main document:
dance7
Click the second button at the bottom of the Layers Panel to add a mask to this ground layer. Use a soft black brush to remove the trees and blend the ground with the background:
dance7a

Step 8

Apply Gassian Blur with 4 px to this ground:
dance8
On this Filter Mask use a soft black brush to remove the blur effect on the foreground:
dance8a

Step 9

To change the color of the ground, I used an adjustment layer with Clipping Mask. Go to Layer > New Adjutment Layer > Hue/Saturation:
dance9
dance9a

Looking For Photoshop Expert in Fiverr http://www.fiverr.com/dreamytouch
No Comment

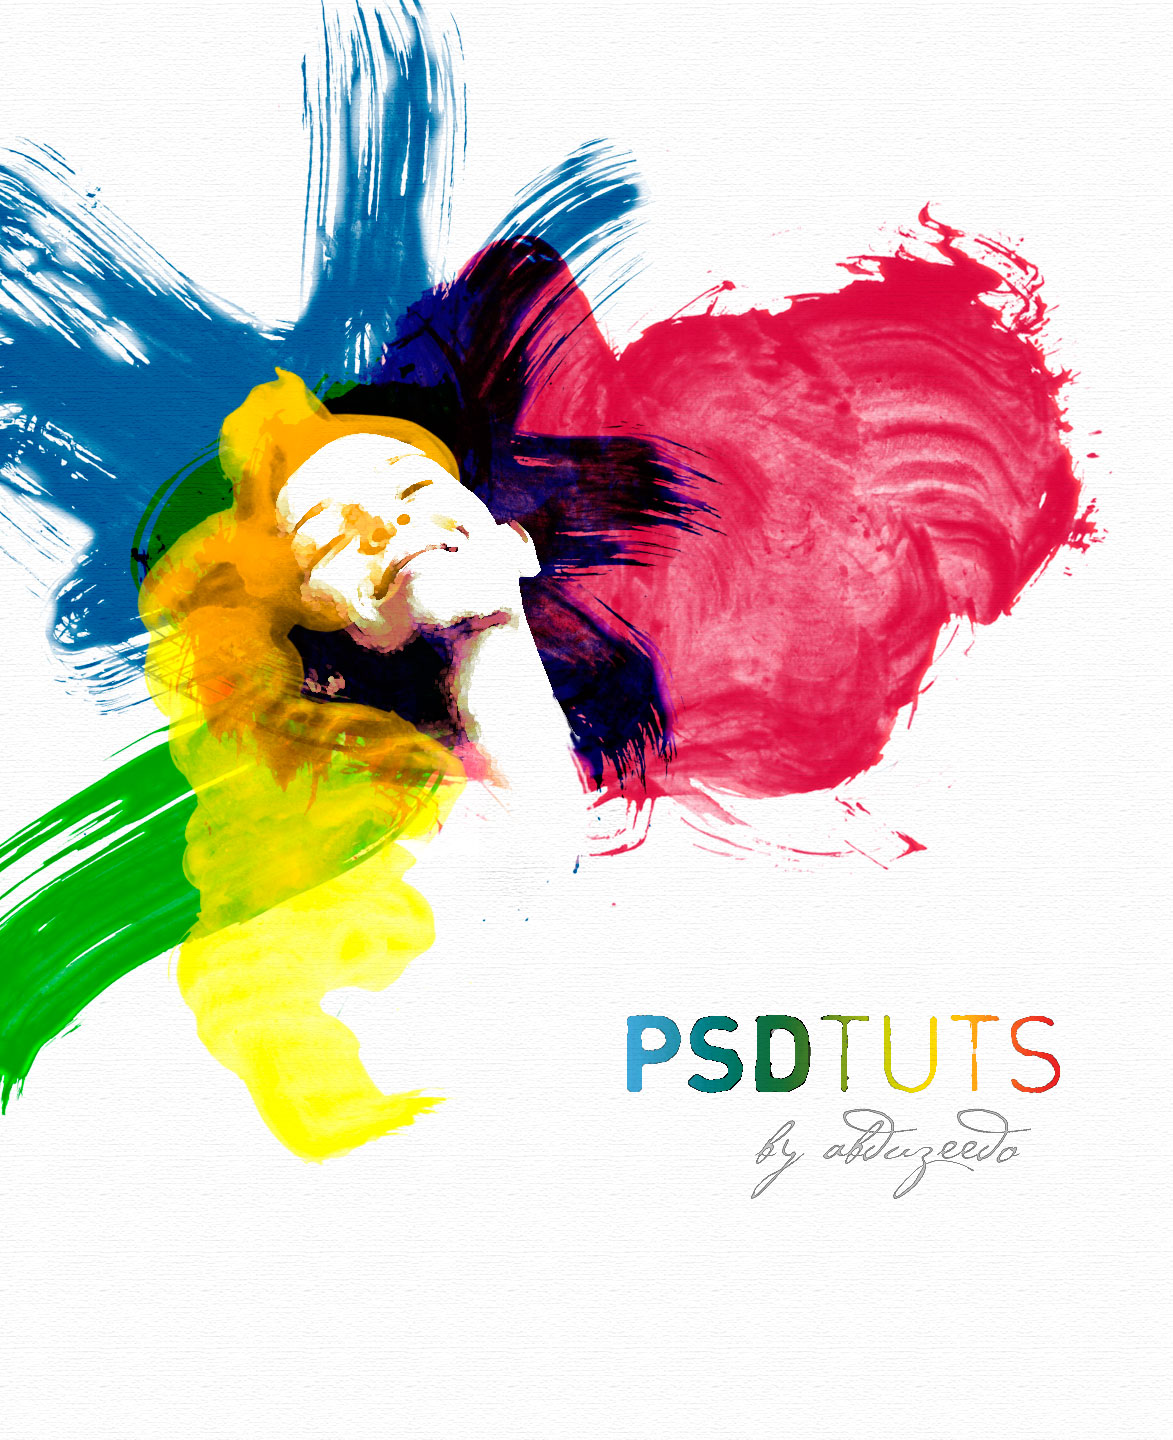
Cool Water Colour Effect Tutorial in Photoshop

Preview

Step 1

Create a new document and a new layer. Rename the layer to "texture" and fill it with white. Make sure that the foreground is white and the background is black. Then go to Filter>Texture>Texturizer, and use Canvas for the Texture, 80% Scaling, and 2 for the Relief.
Watercolor Effects in Photoshop

Step 2

Place an image in your document. The one used in this tutorial can be downloaded at this link. Then delete the background. You can use the Path Tool (P) or the Polygonal Lasso Tool (L). Tip: It doesn't need to be perfect because we will apply some filters in the next step.
Watercolor Effects in Photoshop

Step 3

Select the layer of the girl and go to Image>Adjustments>Levels. We want to increase the whites here. Then go to Image>Adjustments>Hue/Saturation, and change the Saturation to -65.
Watercolor Effects in Photoshop

Step 4

Now go to Filter>Artistic>Watercolor. Use the following settings: Brush Detail 9, Shadow Intensity 0, and Texture 1.
Watercolor Effects in Photoshop

Step 5

With the girl's layer selected, go to Layer>Layer Mask>Reveal All. Then select the Brush Tool (B), with black for the color, and mask the body of the girl.
Watercolor Effects in Photoshop

Step 6

We need the Bittbox Watercolor Brushes 2 that you can download at this link.
Next we create a new layer. Then with the Brush Tool (B) selected, choose the seventh brush from the BB Watercolor Brushes. Use black for the color. Then reduce its size to fit the document. After that, rotate and resize the layer. The idea is to create watercolor-style hair for the girl using the brush.
Watercolor Effects in Photoshop

Step 7

Now go to Layer>Layer Style>Blending Options. Change the Fill Opacity to 0. Then select the Color Overlay option. Use red for the color and Multiply for the blend mode. For the Opacity use 70%. Then select the Satin option. Use Hard Light for the blend mode, purple (#5d085c) for the color, 20º for the Angle, Distance 4px, and Size 12px.
Watercolor Effects in Photoshop

Step 8

Create a new layer. Then select another brush with the Brush Tool(B). I used the 17th Bittbox Brush. The concept we're using is to design different creative-looking hairstyles. So let's continue with that. On a new layer, paint some brush strokes in the middle of the screen. Then resize and rotate them until they look good. You should achieve a stylized hair look, as in the image below.
Watercolor Effects in Photoshop

Step 9

Go to Layer>Layer Style>Blending Options. Set the Fill Options to 0. Then add a Color Overlay. Use Overlay for the blend mode, Blue (#002cec) for the color, and set it to 50% Opacity. Then select Satin. Then use the following settings: a slightly darker blue (#065795) color, a Linear Burn for the blend mode, a 100% Opacity, a 19º Angle, an 11px Distance, and a 14px Size.
Watercolor Effects in Photoshop

Step 10

Let's brush in some more hair. This time we'll use green. Create a new layer, and select the Brush Tool(B). Then select another brush from the watercolor set. Select the last one, reduce its size, and paint more hair. Use just one click when brushing. After that you can resize and rotate it.
Now go to Layer>Layer Style>Blending Options. Again set the Fill Options to 0. Then add a Color Overlay, use Multiply for the blend mode, Green (#18ff00) for the color, and 100% for the Opacity. Then select Satin. Use the following settings: darker green (#0b9600), Darken for the blend mode, 100% Opacity, 19º Angle, 4px Distance, and 7px Size.
Watercolor Effects in Photoshop

Step 11

Next we repeat the process one more time. Create a new layer. Then select the Brush Tool(B). Select another brush, reduce its size, and paint more hair. Adjust it by resizing and rotating it until it looks good.
Again, go to Layer>Layer Style>Blending Options. Change the Fill Options to 0. Then add a Color Overlay, use Hard Light for the blend mode, yellow (#ffe400) for the color, and 100% for the Opacity. Then select Satin. Use the following settings: darker yellow (#a2a406), Color Burn for the blend mode, 100% Opacity, 19º Angle, 17px Distance, and 73px Size.
Watercolor Effects in Photoshop

Step 12

Now select the layer with the girl's face. Change the blend mode to Screen. Then make some adjustments, like fixing the neck using a regular brush with a white color.
Watercolor Effects in Photoshop

Step 13

Type the text you want; I typed Psdtuts+. Then go to Layer>Layer Style>Gradient Overlay. Create a gradient using Red, Yellow, Green, and Blue. Use 180º for the angle and Normal for the blend mode.
Create another layer, and make sure that the text is on top of this new layer. Then with the Rectangular Marquee Tool, create a rectangle selection and fill it with white. Next we merge these two layers (the text with the white rectangle). This is necessary to add some text effects; otherwise the filters wouldn't work well.
Watercolor Effects in Photoshop
Advertisement

Step 14

Now we apply some filters to the text. First go to Filter>Brush Strokes>Sprayed Strokes. Use Stroke Length 17, Spray Radius 0, and Stroke Direction Vertical. After that go to Filter>Artistic>Watercolor. Use the following settings: Brush Detail 11, Shadow Intensity 0, and texture 1. That will create a nice text effect, or you could experiment with different filters until you achieve optimal results.
Watercolor Effects in Photoshop

Conclusion

This tutorial presents a quick and easy way to create a nice design. We achieved this by mixing a photo with watercolor effects. We used some watercolor brushes and played with blend modes. Keep in mind though, if you can paint it for real, you will be able to create very original artwork, like the designers I mentioned before.
Watercolor Effects in Photoshop
No Comment

Super Easy Typographic Portrait In Photoshop Tutorial

Typography is an important element in design. So we often discuss about typography here. Today we will create a nice typographic effect using just Adobe Photoshop.

So in this tutorial I will show you how to create a really cool and super easy typographic portrait in Photoshop. For that we’ll use the Displace filter and some Blend Modes to achieve the effect. The entire process is quite simple and straight forward.

Step 1
Open your image in Photoshop and extract its background.

Typographic Portrait

Step 2
Duplicate the layer and go to Image>Adjustment>Desaturate. You will have a black and white photo. Add a white background ti image. After that save the file as PSD otherwise it won't work with the Displace filter.

Typographic Portrait

Step 3
With the Horizontal Type Tool (T) create text boxes and start adding texts. The idea is to play with the texts, they don't have to be readable, or at least with normal legibility, so play with the line-heights, reduce that so the lines overlay one another.

Also make some keywords much bigger and bold as well play with text effect such as italic, bold alignments and text sizes.

Typographic Portrait

Step 4
For each layer, go to Layer>Layer Style>Drop Shadow. Use Multiply for the Blend Mode, black for the color, 90º for the Angle and 5 pixels for Distance, Spread and Size.

Also, group all the layers and the duplicate the group. Go to Layer>Merge Group and then go to Filter>Blur>Gaussian Blur. Use 10 pixels for the Radius. This blurry layer will have to stay behind the regular one.

Typographic Portrait

Step 5
Select all the text layers and merge them into one layer only, then go to Filter>Distort>Displace. A dialog box will appear asking you to choose a file. Select the PSD file we created before into Step 2. After that for the Displace settings use 15 for the Horizontal and Vertical Scale; use Tile for Displacement Map and Repeat Edge Pixels for the Undefined Areas.

The displacement map will distort the layer based on the gray scale photo we used; the dark tones go down while the lights go up.

Typographic Portrait

Step 6
Then put the photo layer on top of the white text layer, then change the Blend Mode of the photo layer to Light Burn.

Typographic Portrait

Step 7
Now go to go to Filter>Noise>Dust & Scratches. Use 7 pixels for the Radius and 0 levels for the Threshold.

Typographic Portrait

Step 8
Mask the text layer so you will have just the texts over the photo.

Typographic Portrait

Final Step
You can decrease a little bit the saturation and as mentioned earlier, you can add more text layers and even try different symbols and shapes to make portrait more attractive.

Typographic Portrait