To start this tutorial, you need two images. One of a pumpkin, and
one of a human. Of course, you can use any fruit/vegetable that you
desire. Both images that I’m using were found at Shutterstock.com.
The Mouth
Once you have your two images, it’s time to begin! Place the image
that contains the face, overtop of the image of the pumpkin. Once both
images on in the same document, decrease the Opacity of the face’s image
to help you better line it up. You can quickly decrease the Opacity to
60% by pressing the number 6 on your keyboard.
Once it’s in place, increase the Opacity back to 100%. Now we need to
isolate the mouth from everything else that came with the image. With
any of the many selection methods that are available to you, create a
selection around the mouth. It can be basic, or super specific. I chose
to use a simple Marquee selection.
When the selection has been created, it’s time to hide everything other than the mouth. This can easily be done with a Layer Mask. At the bottom of your Layers Panel, press the Add Layer Mask button.
Now that a Layer Mask has been added, using a black brush will allow you to hide additional parts of your layer, while a white
brush will allow you to bring those hidden parts back. So with a black
brush, brush around the outside of the mouth, to hide the leftover skin.
At this point, the lips clearly don’t match with the orange pumpkin.
There are many ways you can get around this, including the use of
Adjustment Layers. Let’s start by adding a Hue/Saturation Adjustment
Layer.
You may notice, once you add and adjust the Hue/Saturation, that your
whole image is being change. This is because you need to clip the
Adjustment Layer with the previous layer. This can be done with the
‘clip’ button, which you can see circled above. Once it’s clipped, you
should start to see a more natural result.
Of course, you can continue to add Adjustment Layers as needed. I chose to add a Levels Adjustment Layer, as well.
Remember: All Adjustment Layers come with a Layer Mask, so at anytime
you want to hide/show portions of that Adjustment Layer, you can easily
use your black/white brushes to do so.
The Eyes
For the eyes, you can use the exact same method that you used for the
mouth, which will give you a decent result, but you may still be left
with some visible skin.
In that case, you may want to add a Bevel and Emboss Layer Style, to
give the impression of depth. Here are the settings that I used for the
eyes.
Remember: Depending on the size of your document, you may need to
tweak the settings to get the result that you’re after. Here is what it
looks like after the Bevel has been applied.
And that should do it! Your own human pumpkin, made in Photoshop! Try it out yourself, and share it with the world!
I
really enjoy portraiture. When it's done well, it is very satisfying
and tells a lot about the person in the photo. However, there is always a
little element that is a constant problem for me: fly-away hair,
frizzies, or whatever you call them. They're the strands of hair that
stick out from the person's head and make your photo look a little
messy. Especially with corporate or fashion photographs, they're
practically unacceptable and must go.
I'll be showing you three
techniques that will give you options when tackling those pesky
follicles while keeping the final result natural-looking. As with any
retouching, it's a balancing act of taste vs need while keeping it
realistic. If you go too far, then you'll end up with "helmet hair"
which often looks fake.
Retouching an image is supposed to be done
well and subtle enough that the viewer doesn't notice it. A lot of that
comes from producing the shot properly in the first place, but the rest
comes from good technique and application. So, having your subject
well-groomed or using a hair stylist can be really helpful in reducing
the amount of time and effort needed to fix hair's errant ways. For the
rest, use these three techniques.
Technique #1: Clone Stamp Tool
Clone Stamp is
the Captain Obvious choice for removing heretical hair in Adobe
Photoshop. Simply sample the clean area and then brush over the hair and
make it go away. However, if you've used this tool before, you'll
notice that it has short-comings.
Its main strength is also its
main weakness: it copies exactly what you sampled, pixel-by-pixel. This
can be a problem with textured backgrounds or variations in color or
luminosity. However, with evenly-lit and evenly-colored backgrounds, the
Clone Stamp is awesome. Even
though I used a very small brush size, re-sampled repeatedly and
closely, and used the Lighten blend mode, the Clone Stamp Tool couldn't
handle the gradient.You can further refine your cloning and reduce problematic color/luminosity variations by using different Blend Modes for the brush. I use only three different modes:
Normal
Darken
Lighten
The Normal mode
works most of the time, but sometimes it's too exacting and can be a
problem with backgrounds that have a slight texture. Using the other two
modes can make my changes literally hair-thin. I use the Darken blend mode to retouch lighter hair that's against a darker background. I use the Lighten blend
mode to retouch darker hair against a lighter background. The effect
stops once the hair reaches the same luminosity and color value as the
sampled area. It will leave the areas that already match untouched, so
your corrections are only a couple pixels wide even if your brush size
is many times larger.
Technique #2: Healing Brush Tool
The Healing Brush is a more refined version of the Clone Stamp
tool. It copies the color, luminosity, and texture from the sampled
area over to the target area. It then applies some math and very
seamlessly blends the two into something that looks natural.
The Healing Brush
is great for removing blemishes, pimples, unwanted facial or body hair,
sensor dust, etc. It works better than the cloning technique mainly
because it isn't an exact copy, but smoothly blends the target and
sample areas with the target's surroundings.
Use this tool for backgrounds that are a little more complex or textured -- wherever the Clone Stamp is failing. You can also use it to clean up mistakes the Clone Stamp
has made while preserving the texture. I use it for hair that crosses
the face or is on clothing so that I can be rid of it without losing the
complexities of the skin or fabric.
Again, you can utilize the Blend Modes to further refine your retouching.
Unfortunately, the blending prowess of the Healing Brush
is also a shortcoming. It doesn't do well when your target area is too
close a hard line, such as the edge of someone's head. You'll get a
blurred bleed and it looks messed up. In this case, the Clone Stamp tool may be better suited, adjust the brush's hardness to match the transition. You
can see what happens when the Healing Brush can do when it gets close
to a high-contrast edge. This can happen even if your brush is tiny.
Brush Settings
So,
now you know two tools that zap away errant hair and when to use them,
but we'll go over some common settings I use that get the job done.
Through experiment and experience, I've figured that these tend to
produce the best and controllable results.
I use a Wacom tablet
for maximum control and flexibility, but this will work with a mouse,
too. If you don't own a Wacom and you're doing retouching, then buy a
pen tablet. They start at about $80 (USD) and last a long time. Mine is
six years old.
Clone Stamp
I usually keep the default shape settings, a circle, and use it at 100% Opacity.
I vary the brush's hardness, but rarely go over 80%. In fact, I use
this brush at 0%, 20%, 50%, and 80% increments as I've found it covers
most of my needs. Of course there are times that I'll use a different
hardness setting, but that is case-by-case. And with the pen tablet, I
can vary that further with pen pressure.
Like I mentioned earlier, I utilize different Blend Modes
when I need to. Appropriately matching these different settings to your
situation will result very good cloning and a faster workflow.
Healing Brush
A lot of people would tell you to use this brush with a soft edge. I'm going to tell you to do the opposite. Keep it at 100% Hardness all the time. Additionally, change your brush's shape (Roundness) to a narrow ellipse between 20 and 30%. I also angle it and change the direction, depending on my needs. You can change the angle to adapt to each situation.What these settings do is help the Healing Brush work better by forcing it to re-sample more often and more randomly than a soft-edged circle. Since the Healing Brush automatically
applies blending, you really don't need a soft brush. The results have
been very natural as well as a greatly reduced risk of that edge
blurring I mentioned earlier.
Finally, keep your brush size only
slightly larger than the area you wish to correct, especially with
fly-away hair close to the edge of someone's head or if the background
changes color or luminosity too greatly.
Technique #3: Surface Blur
While
this technique is mainly independent of the other two, it does
incorporate the others for maximum efficacy. It is a really quick way to
remove nearly all that fly-away hair with a single filter effect with
some basic masking. Aside from the processing bottleneck, it is faster
than going over each hair with either the Clone Stamp or Healing Brush.
Unlike Gaussian Blur or the other blurs, Surface Blur doesn't blend the edges beyond it's threshold setting. Surface Blur
considers something an "edge" when there is a significant change in
color and/or contrast. So, things like skin, clothing, and other fine
details will be smoothed, but not the edge of someone's face -- or the
main mass of hair. Gaussian Blur, left, just blends everything together. Surface Blur, right, keeps edges defined.Surface Blur is a great way to clean up a hair edge when you have a gradient background -- where the Clone Stamp
would struggle. It will do a nice job maintaining gradual tonal changes
while keeping hard edges well-defined. Give it a go when you have an
image with a graduated background.
Let's get into the steps for using Surface Blur to clean up hair in your images. Here
is our sample head. Lots of little stray hair and the Surface Blur
technique will do a lot of the work for us. (ISO 200, f/8, 1/160sec,
flash comp +1.3)
Step 1: Create a New Layer
Drag the layer onto the "Create New Layer" icon (Cmd+J or Ctrl+J) so that you don't affect any previous retouching you've done. You can convert this new layer into a Smart Object (Layer > Smart Objects > Convert to Smart Object) to be able to change your settings without having to reapply the filter from scratch. Converting to a Smart Object is optional.
Step 2: Apply the Surface Blur
Go to Filter > Blur > Surface Blur in order apply it. You'll see a preview of the effect at its current settings.
The Surface Blur filter has two sliders, Radius and Threshold. The
Radius determines the amount/strength of blurring. The Threshold
determines the tolerances of what the filter considers to be an "edge."
Going too low with the Radius will give you a halo and going too high
with the Threshold will make you lose your edges.You'lld
to adjust the sliders so that the fly-away hair disappears due to the
blurring, but the main body of hair and hard edges remain quite sharp.
This will take some experimenting and will vary from image to image.
However, I've found that a Radius of 40 pixels and Threshold of 20 pixels gives me great results. As you can see, a lot of the stray hair is gone while the main body of hair is intact.Once
you've gotten the settings pretty close, apply it and evaluate the
results. A lot of the isolated hair should be gone or mostly gone. After
applying Surface Blur, the hairline has been cleaned-up significantly.
The stragglers can easily be handled with the Clone Stamp Tool. (230%
zoom)
Step 3: Clone Stamp Clean-up
There are times when the Surface Blur gets the job done, but often you'll need to tackle the few that got away. With a soft-edge brush, Clone Stamp
those escapees by sampling very close to the target area to avoid
noticeable color variations. I keep my brush no higher than 50%
hardness. Sampling
very close to my target area, I got rid whatever the initial Surface
Blur missed. However, I made sure to try to keep it natural-looking.
(230% zoom)Try not to make the hairline too
clean because then it will look unnatural. You can do a second round of
Surface Blur at lower settings if it could use a little more general
refinement.
Step 4: Create a Layer Mask
Now it's time apply the effect only to the outer hairline. Create a Layer Mask on your layer with the Surface Blur by clicking the "Create Layer Mask" icon. Invert the color of the mask from white (visible) to black (invisible) with Cmd+I (Mac) or Ctrl+I (PC). This will hide the effect. Create a Layer Mask and then invert (Cmd+I or Ctrl+I) it to hide the effect.Now,
with a hard-edged brush (about 80%) reveal the effect by painting on
the mask with white. Limit the revealing by only brushing over the hair
that need to go away. You don't need to be very precise because the Surface Blur should maintain the edging of the main body of hair. This is what the mask should look like. (100% zoom)
Step 5: Add Noise
Surface Blur usually
removes all the noise (grain) in an image. This lack of texture can
ruin the effect by being too smooth. We'll need to add noise in a dosage
that matches the rest of the image. I
zoomed in to 330% to show in more detail the differences between that
retouched and un-retouched areas. This is difference is visible at 100%
and will be more obvious with high-ISO photographs or under-exposed
images that have been brightened.Make sure you're working the image of the Surface Blur layer and not the mask by clicking on the thumbnail of the layer. Go to Filter > Noise > Add Noise. Make sure the layer's image thumbnail, not the layer mask, is highlighted. Otherwise, you'll be adding noise to the layer mask.In the Add Noise dialogue box, turn on the Gaussian and Monochrome settings.
Adjust the slider until the noise pattern and density closely matches
the rest of the image. While not entirely necessary, this small detail
does an excellent job hiding the retouching you've done. For
this image, I applied 3% Noise. It's not perfect, but is the closest
match. At 330% zoom it's really good and when we zoom-out to 100% you
won't notice it.
Conclusion
Before retouchingAfter retouchingWhen
you have a great portrait, sometimes fly-away hair can really be a
pain. While cloning and healing are great, they do have limitations.
Using them in conjunction with the Surface Blur technique can not
only improve your retouching results, but also cut-down on the time and
tediousness of either technique alone.
With practice, you'll be
able to evaluate an image and quickly decide which of these techniques
will be most effective in removing fly-away hair
Selections
are an essential part of any photo editing workflow, but often,
selections aren't as straight-forward as they might seem. In this
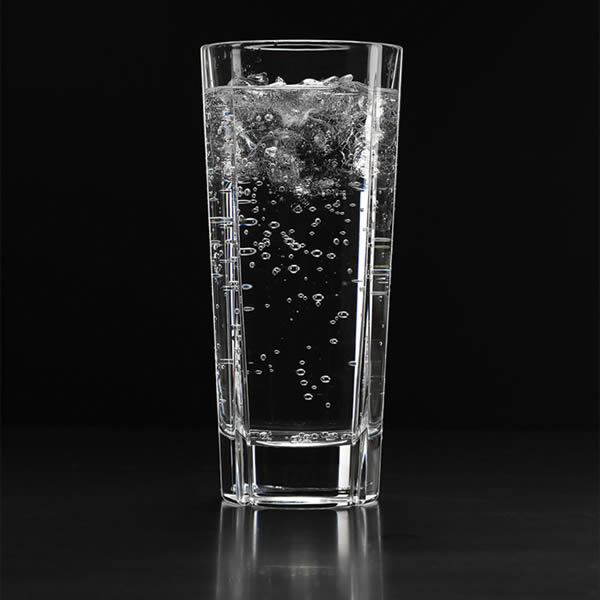
tutorial we will explain how to make a selection of a glass that
includes transparent elements. Let's get started!
Tutorial Assets
The following assets were used during the production of this tutorial.
Selections are an essential part of the image editing process in
Photoshop. The process of making a selection is easy but sometimes
transparent areas can make the process a bit more complicated. For these
types of project, the pen tool is not sufficient. To select areas with a
variable level of transparency we need a tool or command which will let
us manipulate the brightness information of the color channels of that
image. Because we are not only interested in creating a simple cut-out,
rather we are more interested in creating a mask, where we can store
variable level of brightness information for defining that complex level
of transparency. As a channel is just a grayscale image we can use that
channel effectively to create a mask, because a mask also uses
grayscale (pure white=100% opaque and pure black= 100% transparent) to
store transparency information.
Step 2
One of the major advantages of having access to the separate channels
in Photoshop is the ability to make selections. You can use individual
channels to make different selections in the image. When you want to
select a specific item in the image, use the color channels that provide
the greatest contrast around the edges of that item. So let’s start the
initial planning phase.
Step 3
This is the original image. Though this is a CMYK image, same process
will work in case of an RGB image. Only difference will be in the
Channels panel. Instead of four color channels and one composite
channel, there will be three color channels and one composite channel in
the RGB image. The objective of this tutorial is to remove the black
portion but to keep the glass, water, bubbles and the reflection below
the glass. So we can use it on any other background (Solid color or
photo). For this tutorial we will use Apply Image command (Image >
Apply Image).
Step 4
The Apply Image command lets you blend one image’s layer and channel
with a layer and channel of the active image. But remember the pixel
dimensions of the images must match for image names to appear in the
Apply Image dialog box. But here we are not using two images. We are
blending the black channel copy with the black channel copy itself. But
the power of the Apply Image is hiding within the Target section. Here
you can specify a blend mode or blending type which you want to use
during the Apply Image blend.
Step 5
Open the file in Photoshop. Then in the Channels panel examine the
channels for a channel with good contrast. Finding a channel with good
contrast is essential for good selection.
Step 6
Here the black channel is showing good contrast between the glass and the background.
Step 7
Duplicate the black channel by dragging it over the ‘create new
channel’ icon below the Channels Panel. You can also right click on the
black channel and select duplicate channel.
Step 8
Then select the black channel copy and Image > Apply Image.
Step 9
First blend one time with Multiply mode to increase black and in this
process convert from the background any area to black which is gray.
But reduce the opacity (within the Target section) amount to 50% to
create a blend which is not too strong. Otherwise we might remove some
white areas, as they are not pure white.
Step 10
The Multiply blend mode looks at the color information in each
channel and multiplies the base color by the blend color. The resultant
color is always a darker color. Multiplying any color with black
produces black. By using the Multiply blend mode we are removing any
grey portion from the background.
Step 11
Then blend two times with Overlay blend to increase white. Now we can
easily select the white area. Our goal here is to create an effective,
fast and acceptable mask with this process. This time use 100% Opacity
in the blending area.
Step 12
The Overlay blend mode multiplies or screens the colors, depending on
the base color. The base color is not replaced, but mixed with the
blend color to reflect the lightness or darkness of the original color.
White areas become brighter and black areas become darker. By using the
Overlay blend mode we are increasing the strength of the white portion
as we want to keep the white portion but mask out the black portion in
the final image.
Step 13
You can still tweak the black channel copy by using a brush and paint
with white or black color. Paint with white to keep image areas and
paint with black to remove or mask out portion. White denotes opaqueness
and black denotes transparency within a channel.
Step 14
Load the black channel copy as a selection by either
Command/Ctrl-click on the channel or click the first button below the
channels panel, which is load channel as a selection.
Step 15
Then go to the Layers panel and duplicate the background layer by
dragging it over the create new layer button below the layers panel. You
can also right click on the background layer and select Duplicate
Layer.
Step 16
Then target the new layer (Background copy) by left clicking on it
once. Selection still active, click on mask icon below the Layers panel
to create a mask.
Step 17
Now create a new blank layer below and fill it with either red or
blue. Now check the quality of the mask. You will find that within the
mask there are few grey areas.
Step 18
There are two processes to remove this unwanted grey area. Although
first process described below will give you the best output, but still
let’s explore both of them.
Step 19
Process 1: Change the blend mode of background copy layer to Lighten in order to remove grey area.
Step 20
Lighten blend mode looks at the color information in each channel and
pixels darker than the blend colors are replaced, and pixels lighter
than the blend color do not change. As a result dark grey pixels
removed.
Step 21
Process 2: Command/Ctrl-click on the background copy mask thumbnail
to load the mask as a selection. You can also load the selection from
the black channel copy.
Step 22
Then click on the Adjustment layer icon below the Layers panel.
Step 23
This will create a new Levels Adjustment layer.
Step 24
Then in the levels dialogue box first drag the midtone input slider
(middle one) and then the highlight input slider (right one) towards
left to remove grey area or rather converts grey into white.
Step 25
After applying Lighten blend mode, if you check closely you will find
that there are a few broken portions within the white area. You can use
the Clone Stamp Tool to fix these areas.
Step 26
That’s it. You can use the same technique to select complex objects
with variable level of transparency. Below is the before and after
version.